Introduction:
Advertising on Facebook and Instagram can be one of the most powerful ways to reach your target audience, grow your brand, and drive sales. With over 3 billion active users across Meta platforms, it’s no wonder businesses of all sizes are turning to Meta Ads Manager to run high-impact ad campaigns.
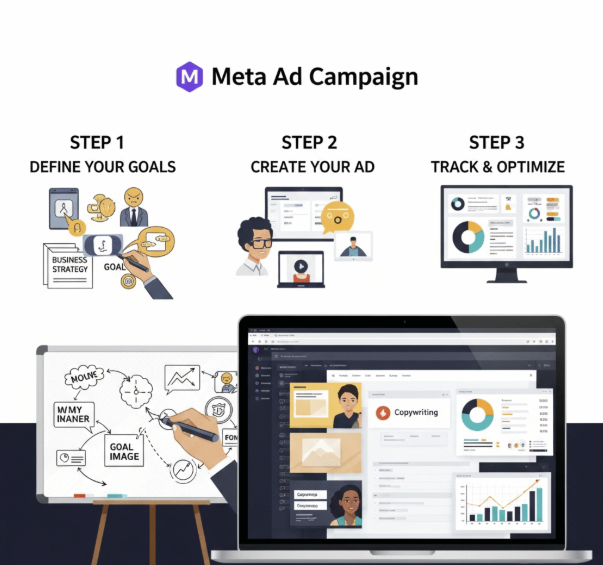
But for many beginners, setting up Meta Ads can seem overwhelming. The good news? It doesn’t have to be. In this guide, we’ll walk you through the 3 easy steps to set up Meta Ads, so you can launch your first campaign with confidence, even if you’ve never run an ad before.
Step 1: Set Clear Objectives and Choose a Campaign Goal
Before you dive into creating visuals or writing copy, the first and most important step is to define your advertising goal. Meta Ads Manager is designed around objectives, so everything you do next will be based on the goal you choose.
Available Campaign Objectives (2025 Updated):
Meta groups objectives into 3 categories:
Awareness – Increase brand recognition or reach
Consideration – Drive traffic, engagement, video views, messages, or app installs
Conversions – Boost purchases, sign-ups, or other valuable actions
Choose the Right Objective:
Here are a few examples:
Want to increase website visitors? ➝ Choose Traffic
Looking to get messages on WhatsApp or Instagram DM? ➝ Choose Messages
Need to generate leads? ➝ Choose Leads
Want to increase online sales? ➝ Choose Sales
Pro Tip: Start with one clear goal. If you try to achieve multiple things in one campaign, your results may be scattered.
Step 2: Define and Create Your Target Audience
Your next step is to tell Meta who you want to reach with your ads. One of Meta Ads’ biggest strengths is its advanced targeting system. You can zero in on your ideal customers using a variety of filters.
Three Types of Audiences:
Core Audiences – Define by demographics, interests, behaviors, and location.
Example: Women aged 25–35 in Delhi who are interested in skincare and online shopping.
Custom Audiences – Target people who already interacted with your business (website visitors, app users, email list, or social media followers).
Lookalike Audiences – Reach new people who are similar to your existing customers.
Targeting Tips:
Use location-based targeting if you’re a local business.
Add interest + behavior layers for better accuracy.
Avoid overly broad audiences unless you’re in a brand awareness campaign.
Audience Size:
For conversions, aim for an audience size between 500K and 2M. For remarketing, smaller segments (like 5K–50K) work better.
Step 3: Design Your Ad & Launch the Campaign
Now it’s time to create the actual ad that users will see. This is where your creativity shines!
Format Options:
Image Ads – A single photo with compelling text and a call-to-action.
Video Ads – Perfect for demonstrating products or telling a brand story.
Carousel Ads – Showcase multiple products or features in a scrollable format.
Reels Ads – Short, vertical videos ideal for Instagram and Facebook Reels.
Ad Components:
Primary Text – This appears above the image or video.
Headline – Short, bold copy to capture attention.
Description – Optional, but useful for adding extra details.
Call-to-Action (CTA) – Examples: “Shop Now,” “Sign Up,” “Learn More.”
Design Tips:
Use bright, high-contrast visuals.
Keep text short and impactful (especially on mobile).
Include your branding (logo, color scheme).
Make sure your landing page matches the ad message.
Meta Pixel (Optional but Powerful):
If your goal is conversions, install the Meta Pixel on your website. This small piece of code tracks user actions (like purchases, sign-ups, and page views) and helps optimize your ads over time.
Bonus: Set Budget and Schedule
Once your ad is ready, set your budget and schedule.
Budget Types:
Daily Budget: Meta will spend up to the set amount each day.
Lifetime Budget: Meta will spread your budget across the entire campaign duration.
How Much Should You Spend?
You can start with as little as ₹100–₹500/day (or $5–$10/day). As you get results, you can increase your budget and scale what works.
Scheduling:
Run ads continuously or set start/end dates.
Use dayparting (schedule ads to run only during specific hours) for more control.
Conclusion:
Setting up Meta Ads may seem complex at first, but by breaking it into these 3 easy steps, anyone can launch a professional ad campaign on Facebook and Instagram:
Choose the right campaign objective
Build a targeted audience that fits your goals
Design and publish a compelling ad with a clear call to action
Start small, monitor your results, and keep optimizing. Once you see what works, Meta Ads can become one of your most powerful tools for growth.
FAQ's
Not necessarily. You can choose one or both, but running ads across both platforms increases your reach and gives Meta more flexibility to optimize performance.
You can start with as little as ₹100–₹500/day ($5–$10). Focus on learning and testing before scaling up.
Yes! You can use Facebook Lead Forms, Messenger, or WhatsApp as your destination.
The Meta Pixel is a tracking tool that helps measure ad performance and retarget website visitors. It’s highly recommended for Conversion campaigns.
Results vary. Some campaigns see engagement within hours; for conversions or leads, it may take 3–7 days to fully optimize.